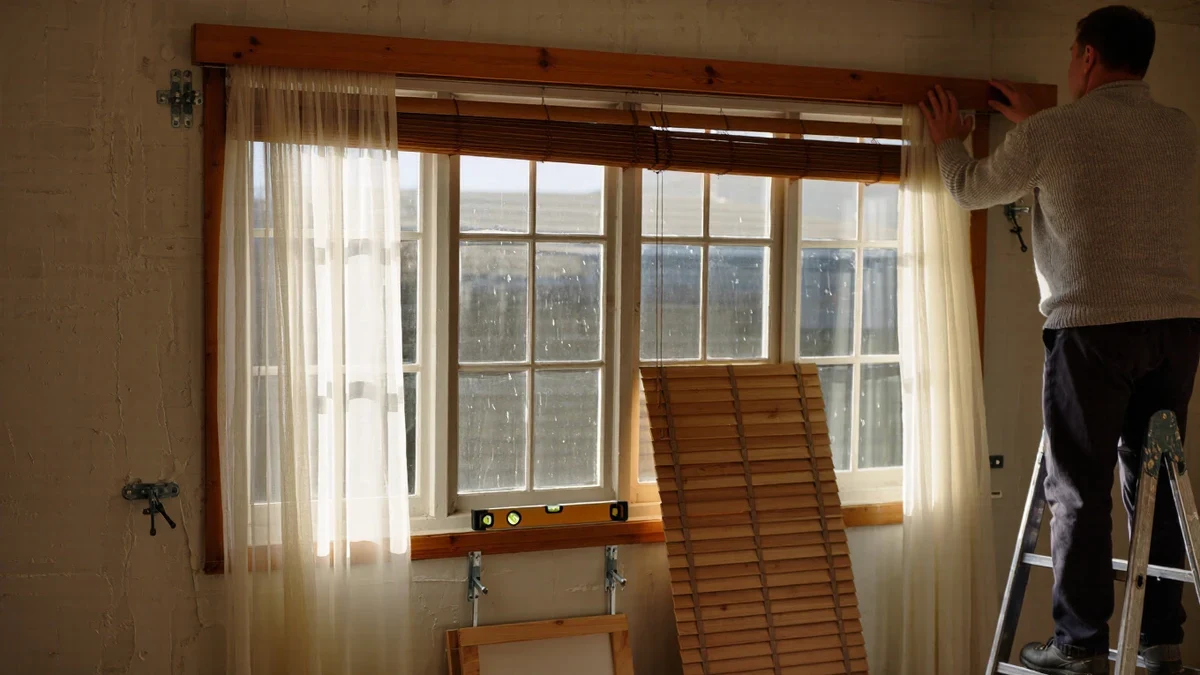
Installing blinds is a one-hour job with a tape measure, a level, a screwdriver and, at most, a drill: The Shade Store's guide reduces the process to choosing a mount type, gathering common tools, measuring three times and fixing two brackets. Measuring, not hardware, is what separates a neat installation from a crooked one.
What tools do you need to install blinds?
The toolkit is deliberately short. According to The Shade Store's step-by-step guide, the typical list includes "pencil, tape measure, level, stepladder, Phillips screwdriver, drill." The same guide notes that a drill is helpful but not essential: it makes boring pilot holes easier, while a screwdriver alone simply takes longer. That matters for renters and anyone cautious about power tools, because the fasteners involved are small and the material is usually soft wood or drywall anchor territory. Nothing in the kit is specialized, and nothing needs to be.
Inside mount or outside mount: how do you choose?
The mount decision comes first because it drives both measuring and bracket placement. Inside-mount blinds sit within the window frame, with brackets secured to the sides or the "ceiling" of the window box, and they show off trim while admitting slightly less coverage. Outside-mount blinds fix to the wall above the window or to the ceiling, covering the frame entirely and blocking more light. The Shade Store's guide frames this as the first step before any measuring happens, since the application type dictates both the ordering dimensions and where the brackets go. Depth is the deciding physical fact: a shallow frame simply cannot accept an inside mount, and the depth available should be measured and written down before anything is ordered, because depth is the one dimension no supplier can correct after the blinds are cut.
How do you measure so blinds fit?
Measure each window separately, with a steel tape, and write everything down. For width inside the frame, measure at the top, middle and bottom, because as The Shade Store's guide puts it, "no window is completely square, so measuring three times helps ensure your window treatments will fit correctly." The narrowest width wins; for height, the longest measurement wins. Home Depot's guide adds the practical detail that bracket placement determines the headrail position: "before installing blinds, use a metal tape measure to determine where to place the headrail brackets." Outside mounts are measured to the area the blinds should cover, with overlap added beyond the frame's edges to reduce light gaps.
What is the installation sequence?
The process, following the supplier guides, is a short numbered ladder.
- Hold the headrail level at the intended position and mark the bracket locations with a pencil.
- Check the marks with a level before drilling anything.
- Drill pilot holes at the marks if using a drill, keeping them shallow in wood frames.
- Fix the brackets with the supplied screws, seated firmly but not overtightened.
- Snap or slide the headrail into the brackets until it locks.
- Attach the wand or cord, test the raise and lower several times, and adjust the brackets if the motion binds or the headrail sits proud of the frame.
Home Depot's version of the sequence is the same: mark, drill pilot holes, screw in the brackets, snap in the headrail, attach the wand or cord. Two people make the job easier on wide windows, one holding the headrail while the other checks level, but the guides treat it as a single-person task.
When should a professional take over?
Standard corded and wand-tilt blinds are a reasonable do-it-yourself job. Motorized blinds are the line: anything involving wiring, mains power or integration into a home's electrical system belongs to a licensed professional in those words, and suppliers route motorization through their own installation services for exactly that reason. Very heavy treatments, ceiling fixings into uncertain material, or upper-floor windows beyond a safe stepladder reach are also better handed over. The measuring, however, stays with the resident regardless of who installs: custom blinds are cut to the numbers provided, and the three-measure rule is what keeps an order honest.
How do you avoid damaging the frame?
Restraint with the drill is most of the answer. Pilot holes should be small, just deep enough to give the screw a start, because oversized holes in a softwood frame leave brackets loose and the wood split at the edge. Masking tape over the mark keeps the drill from wandering and the paint from chipping around the hole. If a bracket lands over hollow drywall rather than wood, the fix is a wall anchor rated for the blind's weight, seated fully flush before the screw goes in. And when a hole goes wrong, a toothpick and wood glue fill it enough to re-seat a screw a few millimeters away, which is a better outcome than forcing a loose fastener to hold a headrail it cannot. None of this is structural work; it is care, applied one hole at a time.
What changes with wide or heavy blinds?
Width multiplies everything: weight, sag and the leverage a cord pulls on. Wide blinds want a center support bracket in addition to the two end brackets, because an unsupported headrail bows visibly within a season, and faux-wood and wood slats at scale can weigh enough that lifting them daily becomes a chore worth respecting. Splitting one wide window into two or three blinds mounted side by side keeps each unit light, keeps the raise-and-lower smooth, and looks intentional rather than improvised when the headrails align. Cordless lift mechanisms, which suppliers now fit on many ranges, remove both the dangling loop and most of the strain. The measuring discipline does not change at width, it only matters more, because a quarter-inch error across a six-foot opening becomes a visible sliver of daylight.
How do you keep blinds working after installation?
Blinds forgive neglect for years and then fail all at once, usually at the worst season of the year. The maintenance that prevents that is unglamorous: a monthly pass with a microfiber cloth or the brush attachment of a vacuum along the slats, working top to bottom so dust falls onto uncleaned slats rather than finished ones. Fabric shades want a low-suction setting and no water on bonded seams; wood and faux-wood slats take a barely damp cloth, never a wet one, since swelling shows. The mechanism wants almost nothing beyond an occasional check that brackets are still tight and cords run free of twists. Anything beyond that, a slipping cord lock, a motorized unit that will not pair, is the supplier's service line or a licensed professional for powered units, in those words, and not a repair to improvise.