Learning how to caulk a bathroom comes down to three moves: strip every trace of the old bead, lay a single continuous line of the right sealant, and let it cure fully before the tub sees water again. Done well, the joint around a tub, sink, or tile edge reads as one crisp shadow line — and, more importantly, keeps water out of walls and cabinets. Done badly, it peels in a season and invites mildew into the gap it was meant to protect.
The materials matter as much as the hands. Silicone sealants flex and shrug off moisture but cannot be painted; acrylic latex goes on easily and takes paint but suits drier rooms; hybrid polymer products claim both worlds. According to Midland Tool's guide to caulk types and uses, silicone is the pick for bathrooms because it adheres well to non-porous surfaces like glass, metal, and ceramic, while latex varieties clean up with soap and water but may not hold up in high-moisture, high-movement joints.
This guide walks the whole sequence in order — removal, prep, application, tooling, and cure — with the tool list kept deliberately short. Nothing here involves structural work; it is a surface task a careful reader can complete in an afternoon, plus the patience the curing demands. We covered a connected angle in How to Paint a Room in the Right Order, According to Suppliers.
What tools and materials do you need to caulk a bathroom?
The kit is modest. Most items are already in a household drawer; the rest cost little at a hardware counter.
- A caulk gun, unless using a squeeze-tube product with its own applicator.
- A tube of bathroom-rated sealant — silicone, acrylic latex, or hybrid polymer, matched to the joint.
- A removal tool or utility knife for lifting the old bead.
- Painter's tape for masking crisp edges.
- Isopropyl alcohol or a mild cleaner, plus lint-free cloths.
- A smoothing tool, or simply a gloved finger dipped in water.
Choose the sealant by where it will live. For tub and shower lines, a silicone or hybrid product labeled for baths is the durable choice. For the seam where a painted wall meets trim away from water, an acrylic latex is easier to work and repaint. Squeeze-tube options exist too: the brand describes its Flex Caulk line as delivered through an adjustable trigger-flow nozzle that removes the need for a caulking gun entirely, letting the flow stop when the trigger stops (Flex Seal Products). Whatever the format, look for mildew resistance on the label — the bathroom is exactly where it earns its keep.
How do you remove old caulk the right way?
Every remnant of the old bead has to go. New sealant bonds to the substrate, not to a crumbling predecessor, and a half-removed line shows through the fresh one as a lumpy ridge.
- Soften the bead by scoring along its top and bottom edges with a utility knife, held shallow so the porcelain or tile surface is not scratched.
- Lift the loosened caulk with a removal tool, a putty knife, or needlenose pliers, pulling in long strips where it will release.
- Scrape the residue — a caulk-removal tool or a plastic scraper works without marring glaze.
- Clean the empty joint with a mildew cleaner if any staining is present, then wipe with alcohol and let it dry completely.
Patience here is the whole craft. A joint that still hides fragments or soap film will shorten the life of whatever goes over it. Take the time to run a fingernail along the gap: anything that flakes under the nail comes off before the new tube is opened.
How do you apply a clean bead around a tub, sink, or tile edge?
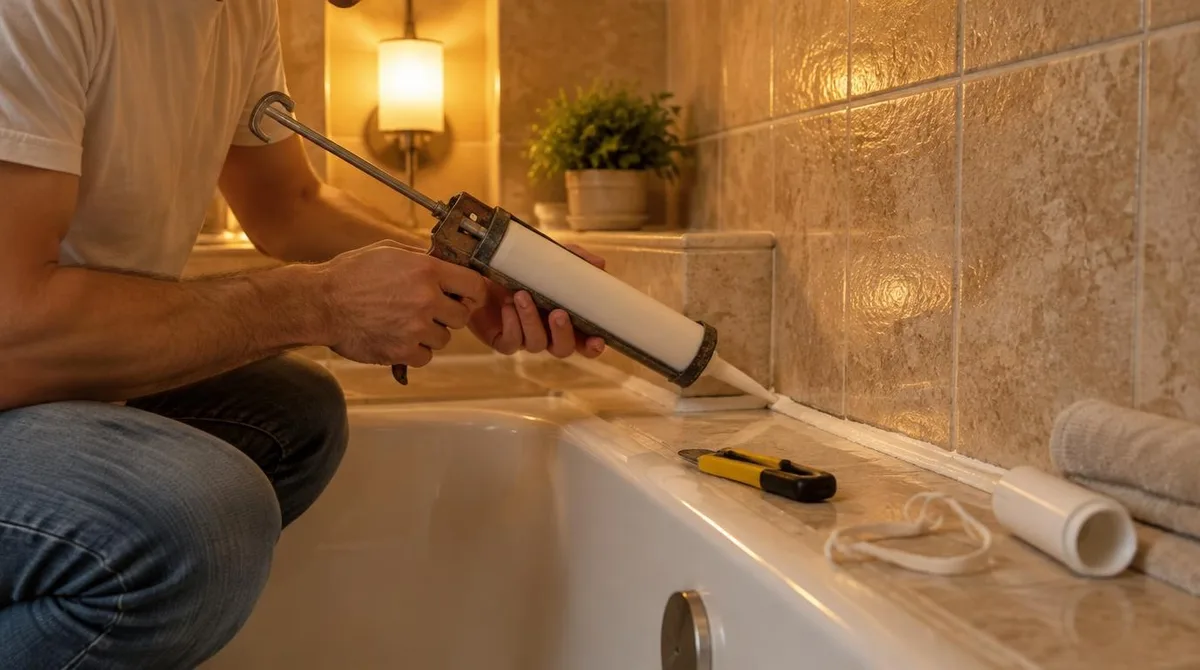
Application is a single, steady pass — not a series of dabs. Midland Tool's caulk guide recommends cutting the nozzle tip at a 45-degree angle for better control, and taping along both edges of the line to guarantee clean borders. The opening should be slightly smaller than the finished bead; more can always be trimmed, but too wide a hole floods the joint.
- Mask both sides of the joint with painter's tape, leaving the gap itself exposed.
- Cut the tip at 45 degrees, puncture the tube seal, and load the gun.
- Squeeze until sealant reaches the opening, then run the nozzle along the joint at a consistent angle and speed, laying one continuous bead.
- Smooth within minutes — a gloved finger, a caulking tool, or a damp sponge, working the bead into the corner so it seals rather than sits on top.
- Pull the tape away before the sealant skins over, dragging it away from the line at a shallow angle.
For readers who dread the gun, the squeeze-tube route is a genuine alternative. Flex Seal Products' documentation describes its trigger-flow nozzle as delivering a controlled bead with no running or dripping, and notes the product is mildew resistant with a preservative that inhibits mildew growth on the caulk surface. The same brand film, embedded below, shows the nozzle in use — a useful preview for anyone deciding between formats before buying.
Flex Caulk's own film shows the trigger-flow nozzle laying a bead without a caulk gun — the squeeze-tube method described in this section.
How long does bathroom caulk take to dry and cure?
Drying and curing are different events, and confusing them is the most common way a good bead is ruined. Drying means a skin has formed on the surface; curing means the material beneath has hardened into its final, waterproof state. A bead can look finished hours before it is.
Per Midland Tool's published guide, most caulks form a skin dry to the touch within 30 minutes to two hours, and acrylic and latex varieties are often paintable within two to four hours. Full cure runs longer: roughly 24 hours for acrylic latex, 24 to 48 hours for silicone, and up to ten days for polyurethane — the last being an exterior-grade product rarely used at a tub. The same source cautions that thick beads, high humidity, and low temperatures all slow the process, which describes most bathrooms after a hot shower.
The practical rule the guide states plainly: do not expose fresh caulk to water or paint until it is fully cured. In a working household, that usually means running the bath schedule around the cure window — showers taken earlier in the day, the bathroom vented, and the tub kept dry overnight at minimum. Check the specific tube's printed times; they govern over any general figure.
Which caulk type belongs where? A quick comparison
The bathroom contains several different joints, and one tube rarely suits them all. The table below summarizes the types as their manufacturers' and suppliers' documentation describes them.
| Type | Best bathroom use | Paintable | Full cure (per Midland Tool) |
|---|---|---|---|
| Silicone | Tubs, showers, sink rims — non-porous surfaces like ceramic and glass | No | 24–48 hours |
| Acrylic latex | Drier seams: trim, baseboards, painted-wall joints | Yes | About 24 hours |
| Hybrid polymer | Wet and dry joints alike; brands describe wet-surface adhesion for some formulas | Some formulas (per brand) | Check tube |
| Polyurethane | Exterior and construction joints — not a tub-line choice | Varies | Up to 10 days |
What this means for a shopping list: one silicone or hybrid tube covers the wet lines at tub, shower, and sink, and a small acrylic latex tube covers the dry finishing seams. Retail listings reflect the same split — Amazon's caulk category, for instance, separates latex, adhesive, and silicone sealants into their own best-seller groupings (Amazon), a fair proxy for how distinct these products are in practice.
How do you keep caulk lines from failing early?
Most early failures trace to prep or cure, not to the product. Three habits extend the life of a bead considerably.
- Squeegee or towel the tub and tile edges dry after use, especially during the first weeks. Standing water is the enemy of a curing and freshly cured joint.
- Ventilate the room. Humidity slows cure and feeds the mildew the sealant's preservatives are meant to inhibit.
- Inspect the lines a few times a year. A bead that has shrunk away from the tile or torn at a corner of movement is simplest to redo while the failure is still small.
When a line does need renewal, the removal-and-reapplication sequence above applies in full — there is no shortcut that lets new caulk bond over old. Readers tackling adjacent bathroom projects may find the same prep-first logic in the guide to cleaning tile and grout, where the joint and the field are treated as one surface story. Readers following this should also see How to Clean Tile and Grout, According to Marazzi's Published Care Guides.
The takeaway: slow prep, one steady pass, a full cure
Caulking a bathroom rewards restraint over speed. Strip the old bead completely, choose a sealant rated for the wet joint it will serve, lay one continuous line with a masked edge, and honor the cure time printed on the tube. The evidence from supplier and maker documentation converges on those four points, and none of them costs more than patience. A bead laid this way should hold its line and its seal through years of steam, splashes, and Saturday cleaning — which is, in the end, the only finish that matters at the edge of a tub.